Understanding the Exposure Triangle for Photography
by Arthur Yang December 12, 2023

Have you ever wondered why your photos look amateur?
Even with a smartphone camera, you can capture studio grade pictures as long as you master the Exposure Triangle!
Look below to see what we will cover!
1. Shutter Speed
2. Aperture (f-stop)
4. ISO
3. Balancing the Exposure Triangle
5. Camera Modes: Auto vs Manual
6. Conclusion
Let’s start!
Exposure Triangle
Shutter Speed

Shutter speed denotes the duration during which the camera shutter remains open, allowing light to reach the camera sensor and capture an image.
Essentially, it dictates how much time the camera spends capturing a photo, influencing various aspects of the image’s appearance.
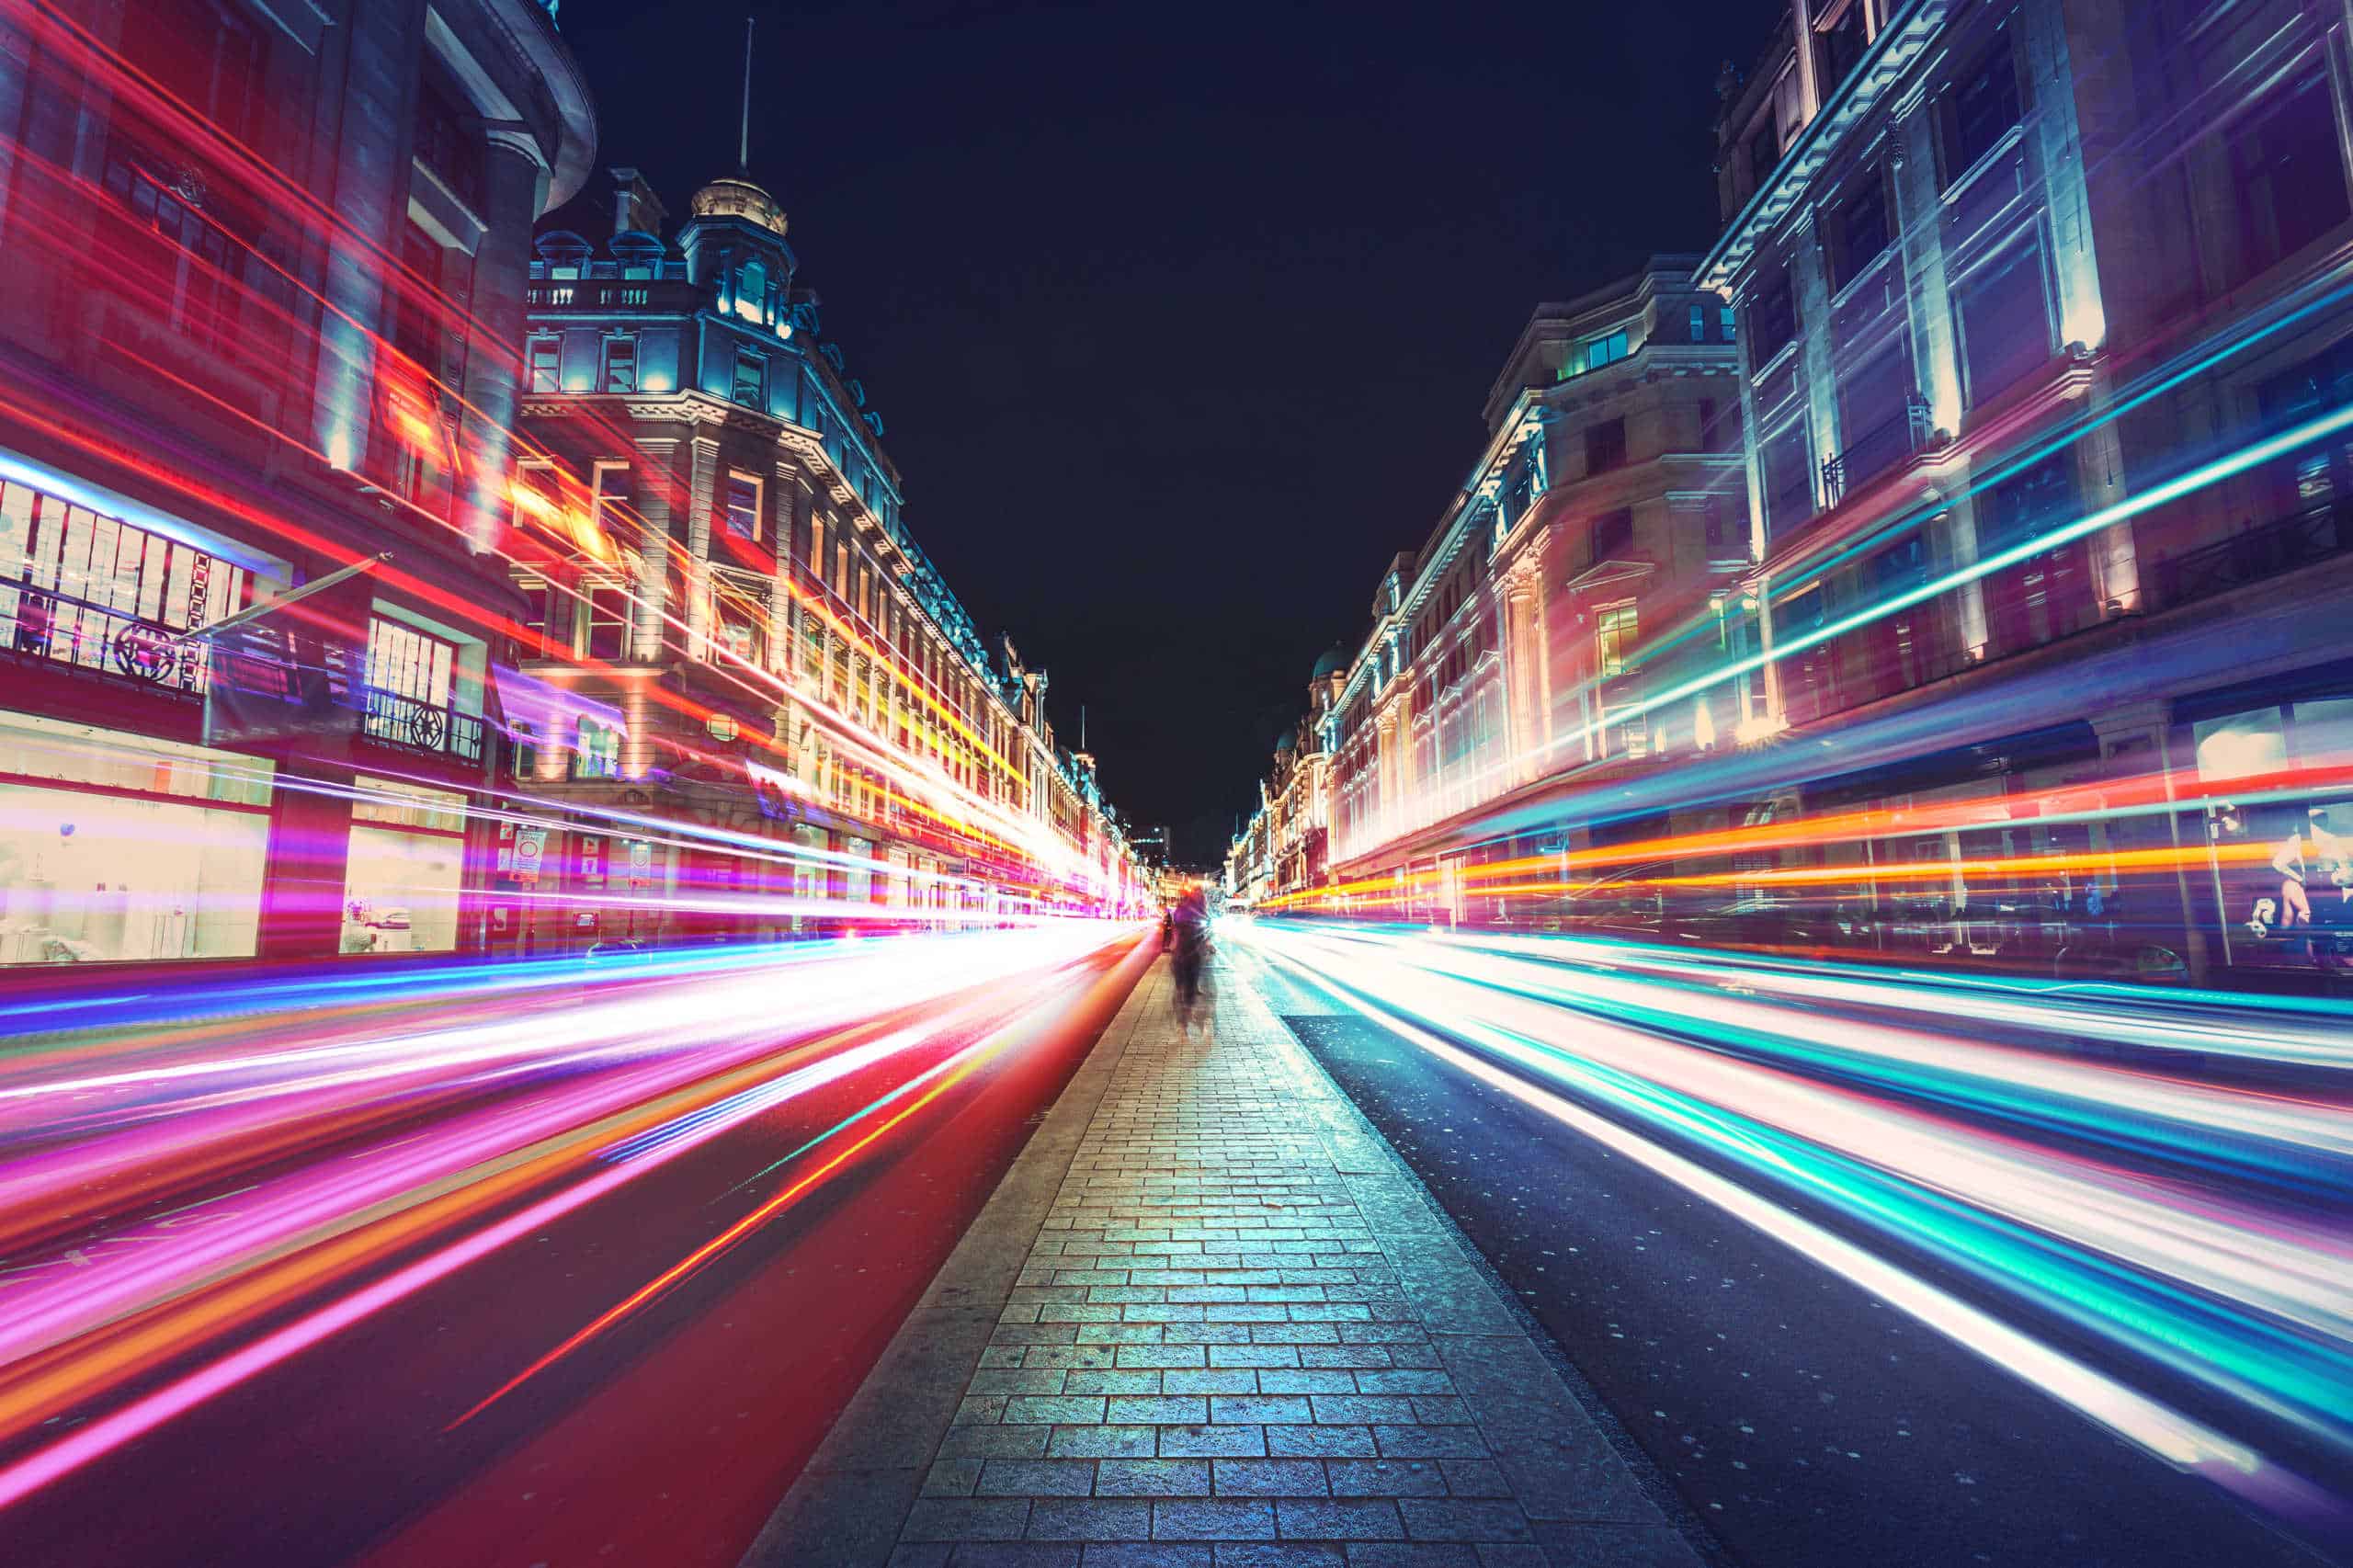
When employing a prolonged shutter speed, also termed a “slow” shutter speed, the sensor is exposed for an extended period.
This leads to an impactful effect known as motion blur.
In instances of extended shutter speeds, moving elements within the photo display a blurred appearance along the direction of their motion.
This technique is frequently utilised in advertising for vehicles like cars and motorcycles, imparting a sense of speed and movement by intentionally blurring the moving wheels.
Landscape photographers may intentionally opt for extended shutter speeds to instill a feeling of motion while maintaining overall sharpness in the scene.
Conversely, fast shutter speeds can be harnessed to freeze motion.
Fast shutter speeds can eliminate motion from rapidly moving subjects, like in passing cars.
The control of shutter speed is pivotal in achieving the aforementioned effects.
In summary, rapid shutter speeds freezes action, while prolonged ones produce a visual sense of motion when capturing moving subjects.
Measuring shutter speeds
Shutter speeds are commonly expressed as fractions of a second when under a second.
For instance, 1/4 denotes a quarter of a second, and 1/250 signifies one-two-hundred-and-fiftieth of a second, equivalent to four milliseconds.
Most modern DSLRs and mirrorless cameras can handle shutter speeds as fast as 1/4000th of a second, with some capable of even quicker speeds like 1/8000th of a second.
Relationship with exposure
Shutter speed also significantly impacts exposure, which relates to the brightness of an image.
Extended shutter speeds allow the camera sensor to accumulate more light, resulting in a brighter photo.
Conversely, swift shutter speeds expose the camera sensor to a minimal amount of light, yielding a darker image.
Aperture (f-stop)

Aperture, a fundamental element of photography, governs the size of the lens opening, thereby regulating the amount of light reaching the camera sensor.
This critical setting has a profound impact on both exposure and the depth of field in an image, allowing photographers to wield creative control over their shots.
Common aperture sizes
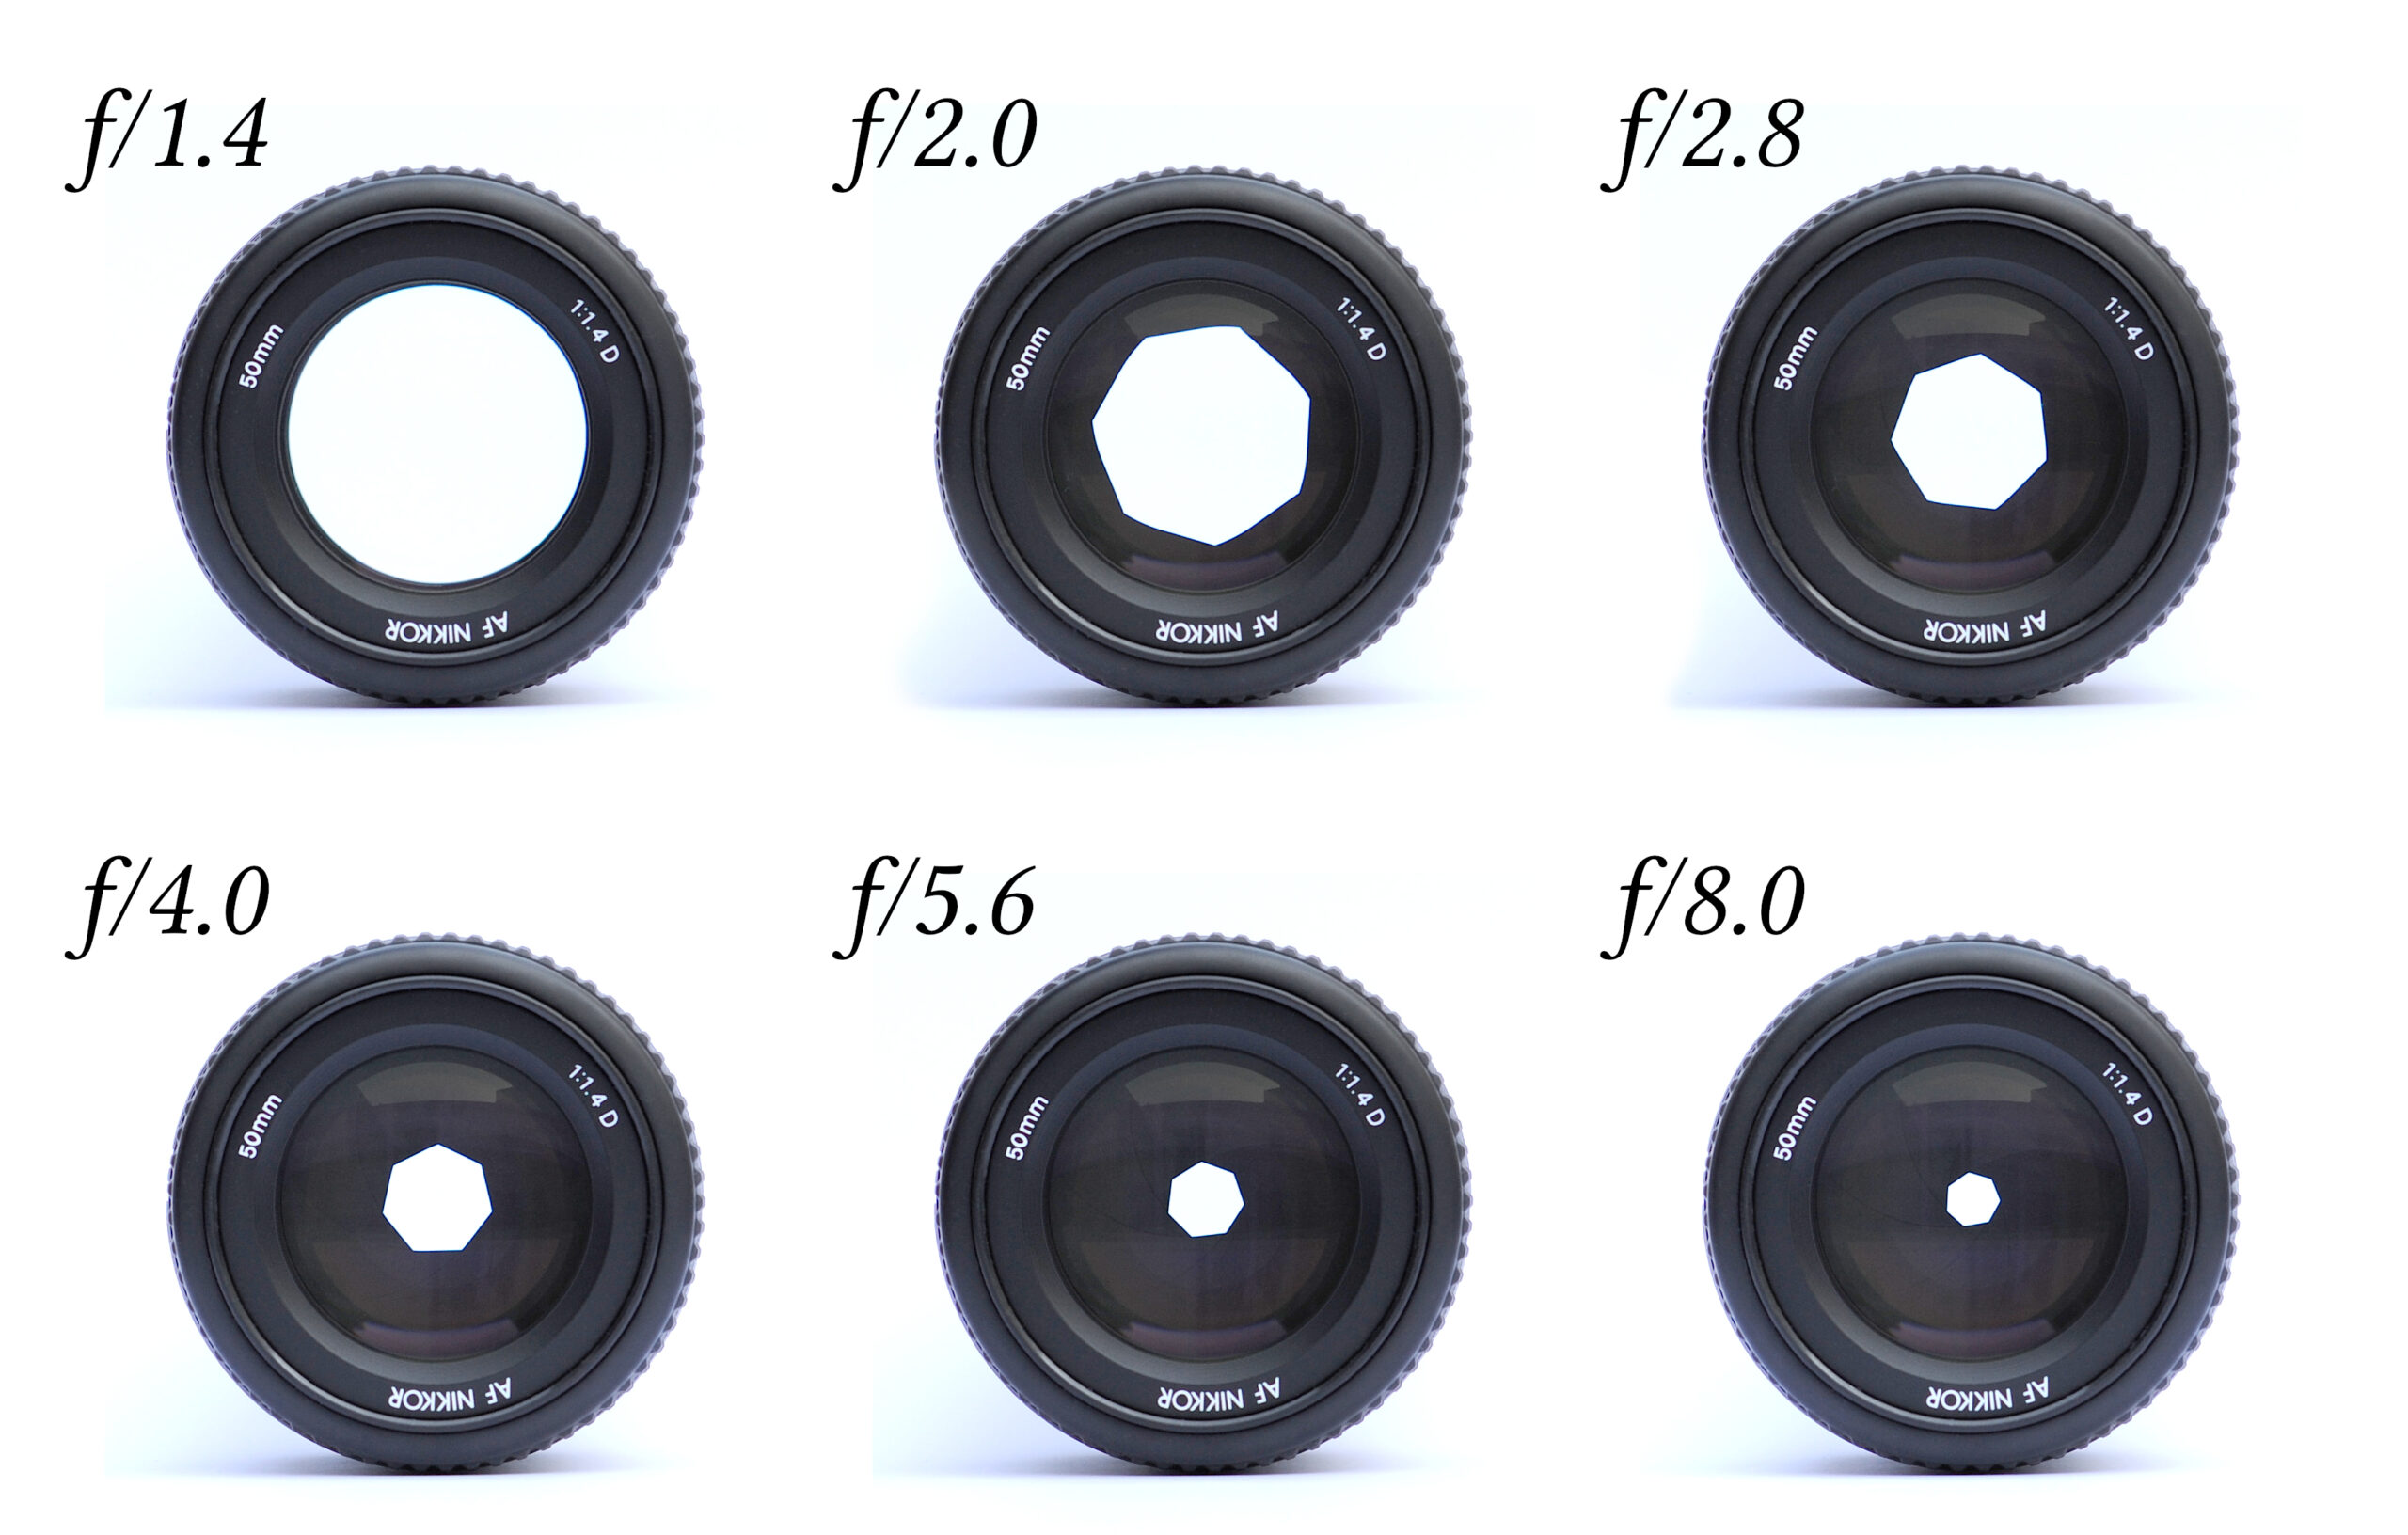
Aperture sizes are represented by f-numbers or f-stops.
A low f-number, such as f/1.8, indicates a wide-open aperture, while a high f-number, like f/16, signifies a more closed aperture.
Understanding the implications of different aperture sizes empowers photographers to make informed decisions based on the desired outcome.
Wide Aperture (e.g., f/1.8 – f/2.8):
- A wide aperture permits more light to enter the lens, making it ideal for low-light conditions.
- It also results in a shallow depth of field, isolating the subject from the background.
- This is often used for portrait photography, where a blurred background (bokeh effect) enhances the visual appeal, drawing attention to the subject.
Medium Aperture (e.g., f/5.6 – f/8):
- A medium aperture strikes a balance between light intake and depth of field.
- It is commonly employed in landscape photography to keep both the foreground and background in focus, ensuring sharpness across the entire scene.
Narrow Aperture (e.g., f/11 – f/16 and higher):
- A narrow aperture reduces the amount of light entering the lens and results in a greater depth of field.
- This is useful for scenarios where maintaining sharpness throughout the entire frame is crucial, such as architectural photography or capturing detailed scenes.
Relationship to exposure
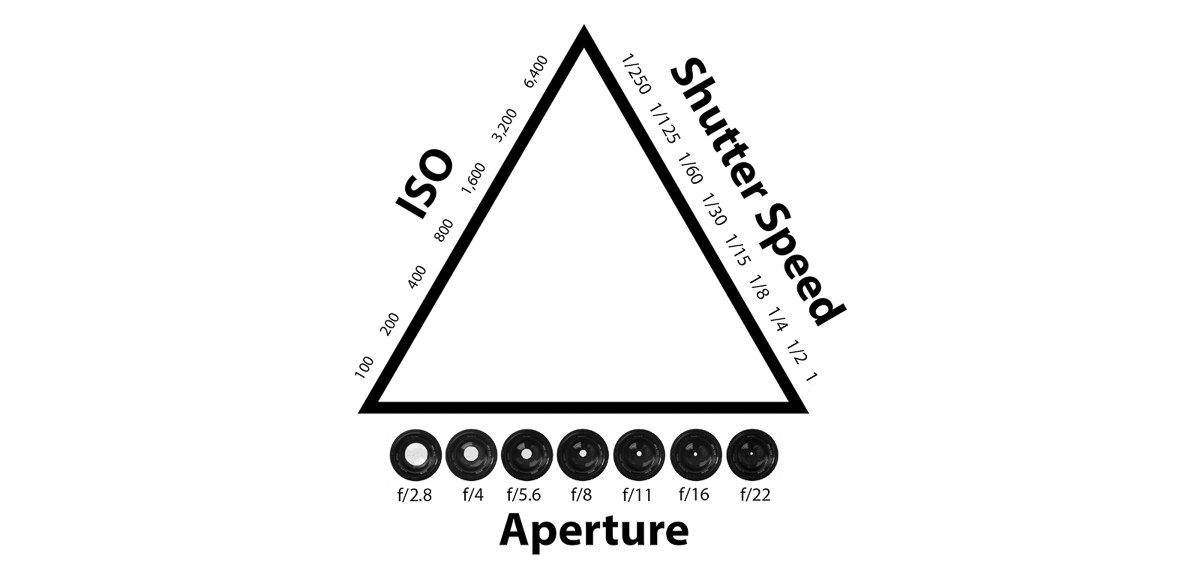
Aperture, alongside shutter speed and ISO, forms the exposure triangle, influencing the overall brightness of an image.
A wider aperture allows more light, contributing to a brighter image, while a narrower aperture reduces light intake, resulting in a darker image.
Balancing these elements is essential for achieving well-exposed photos.
Bokeh effect
The bokeh effect, associated with wide apertures, occurs when the background of an image is intentionally blurred, drawing attention to the sharply focused subject.
This aesthetically pleasing effect is highly sought after in portrait and artistic photography.
Achieving bokeh involves using a wide aperture, creating a shallow depth of field that beautifully blurs the background elements.
In summary, mastering aperture settings enables photographers to control the brightness of their images, influence depth of field, and create captivating effects like the bokeh background.
Understanding when to use different aperture sizes is crucial for achieving the desired visual impact in various photographic scenarios.
ISO
ISO, a key component of the exposure triangle, measures the sensitivity of the camera sensor to light.
Manipulating ISO is a powerful tool for photographers, but it comes with a trade-off that must be carefully considered in different shooting scenarios.
While increasing ISO allows for better performance in low-light situations, it introduces a trade-off known as digital noise.
Digital noise manifests as unwanted graininess or speckles in an image, degrading overall image quality.
Striking the right balance between ISO and other exposure settings is crucial to minimise noise while achieving proper exposure.
Common ISO settings
ISO values are typically denoted as numbers, such as ISO 100, ISO 400, or ISO 3200.
Lower ISO values, like ISO 100, indicate lower sensitivity to light, suitable for well-lit environments.
Higher ISO values, such as ISO 800 or above, enhance the sensor’s sensitivity, making them ideal for low-light conditions.
When to increase ISO?
Low-Light Conditions:
- Increasing ISO is essential when shooting in dimly lit environments where there isn’t enough natural or artificial light.
- This is common in indoor settings, nighttime photography, or capturing events in low-light conditions.
Fast-Moving Subjects:
- When photographing fast-moving subjects, a higher ISO allows for faster shutter speeds.
- This is particularly useful for capturing action shots, sports photography, or any scenario where freezing motion is essential.
Lack of Tripod:
- In situations where using a tripod is impractical, such as street photography or event photography, increasing ISO helps maintain a faster shutter speed, reducing the risk of motion blur.
When to decrease ISO?
Well-Lit Environments:
- In well-lit conditions, using a lower ISO (e.g., ISO 100 or 200) is advisable.
- This ensures optimal image quality with minimal digital noise.
Stable Shooting Conditions:
- When shooting with a tripod or in situations where there is little to no movement, a lower ISO can be employed.
- This allows for longer exposure times without introducing digital noise.
Portrait Photography:
- For portrait photography, especially when capturing static subjects with controlled lighting, a lower ISO is preferable to maintain image clarity and detail.
Balancing the Exposure Triangle

When you modify one setting within the exposure triangle, it inevitably prompts corresponding adjustments in the other elements to maintain the desired exposure.
Let’s delve into how alterations in one setting influence the others:
If you widen the aperture, allowing more light into the lens and brightening the image, you may need to counteract potential overexposure by either speeding up the shutter or reducing the ISO.
Conversely, if you narrow the aperture, diminishing the amount of incoming light and darkening the image, compensatory actions might involve either slowing down the shutter or boosting the ISO.
Similarly, adjustments to shutter speed have ripple effects. If you opt for a faster shutter, reducing the light reaching the sensor and resulting in a darker image, balancing the exposure could involve either widening the aperture or increasing the ISO.
Conversely, if you choose a slower shutter, allowing more light and brightening the image, you might need to counterbalance by either narrowing the aperture or decreasing the ISO to prevent overexposure.
In the realm of ISO adjustments, elevating sensitivity brightens the image, and to counteract potential overexposure, you can either narrow the aperture or increase the shutter speed.
Conversely, reducing sensitivity darkens the image, prompting compensatory actions such as either widening the aperture or slowing down the shutter to maintain the desired exposure.
Consider these adjustments not only in the context of exposure but also as instruments for realising creative objectives.
Alterations to aperture influence depth of field, while changes in shutter speed impact the visual representation of motion.
Acknowledge the inherent trade-offs; increasing ISO may introduce digital noise, and extremely fast shutter speeds may limit the capture of motion in a creative manner.
Ultimately, understanding the intricate relationships between aperture, shutter speed, and ISO empowers photographers to make informed decisions based on both exposure requirements and artistic visions.
Regular practice refines the ability to deftly balance these settings in varied photographic scenarios.
Camera Mode: Auto vs Manual
So, which camera mode should you use?
Here is a quick breakdown of both.
Auto mode
Auto mode is convenient for beginners, as the camera makes most decisions about settings automatically.
However, it limits creative control.
While suitable for quick snapshots, auto mode may not capture the best results in challenging lighting conditions or specific creative situations.
Manual mode
Manual mode provides full control over shutter speed, aperture, and ISO.
This mode is essential for photographers and videographers who want complete creative freedom.
With manual mode, you can tailor settings to achieve specific effects or overcome challenging lighting conditions.
Transitioning from auto to manual mode is a key step in developing your skills and taking control of your camera.
Understanding these basics sets a solid foundation for exploring more advanced camera settings and honing your photography and videography skills.
Conclusions
Good photos don’t require expensive cameras.
Instead, a cameraman with a solid foundation in theory is more important.
Enrol in our course on Mobile Photography now!
Or check out our other courses here!
You can also contact us via the chatbot or simply drop us a DM on our Instagram page if you’d like.
. . . . .
